
Run a show
Start the session
 Start
Start
Press the power key to start. If several profiles are offered, choose the one for your show. A profile holds the settings the studio uses for that show.
Record the show
Press REC and confirm to start or stop recording.
 Recording
The recording includes the program, the show’s picture and sound, as an MP4, plus an MP3 audio version. Retrieve your files from Recordings.
Control picture and sound
The monitoring interface shows the session status and any menus you open with the Deck.
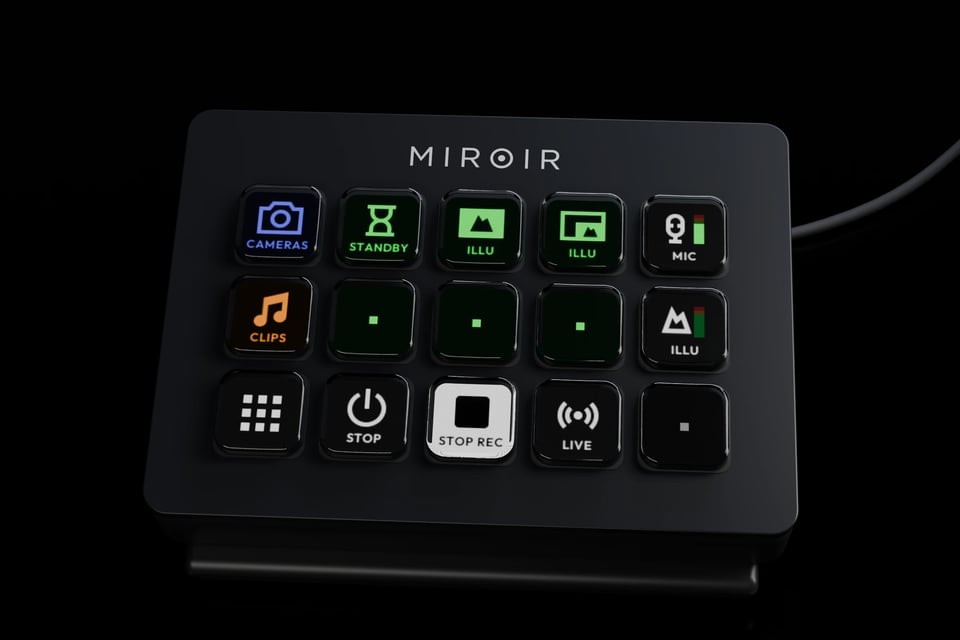
- Cameras
- Speak into each microphone in turn to see SmartSwitch select a shot automatically. In CAMERAS, press a shot key to lock it, then press the same key again to return control to SmartSwitch.
- Scenes
- Show the presentation computer full-screen or alongside a camera, or display a standby screen. Press the active scene key again to return to the cameras.
To choose the available scenes:
Profilesyour profile Scenes - Audio
- Check audio levels. Mute or unmute microphones, illustration audio (including clips), or meeting audio. Muting the meeting also hides the guests.
- Clips
- Open the profile’s clips, then choose an intro or clip to play.
To add your clips:
Profilesyour profile Clips - Menu
- Access the following controls:
 Profiles Choose the profile for your show.
 Lights Change the lighting mood or turn off the lights.
 Meeting Join or create a meeting, if the service is enabled.
 Export Copy a finished recording to an SSD connected to the Director 4K.
 Stop End the studio session.
- Recording
- Start or stop recording after confirmation.
- Live streaming
- Start or stop the live stream.
To set the destination:
Profilesyour profile Outputs Live streaming


If a camera view is locked manually, press its key again to return control to SmartSwitch. Also check the microphones linked to camera views.
To balance voices and content, adjust the Microphones, Illustrations (including clips) and Meeting groups. Set each studio microphone’s level on your audio interface.
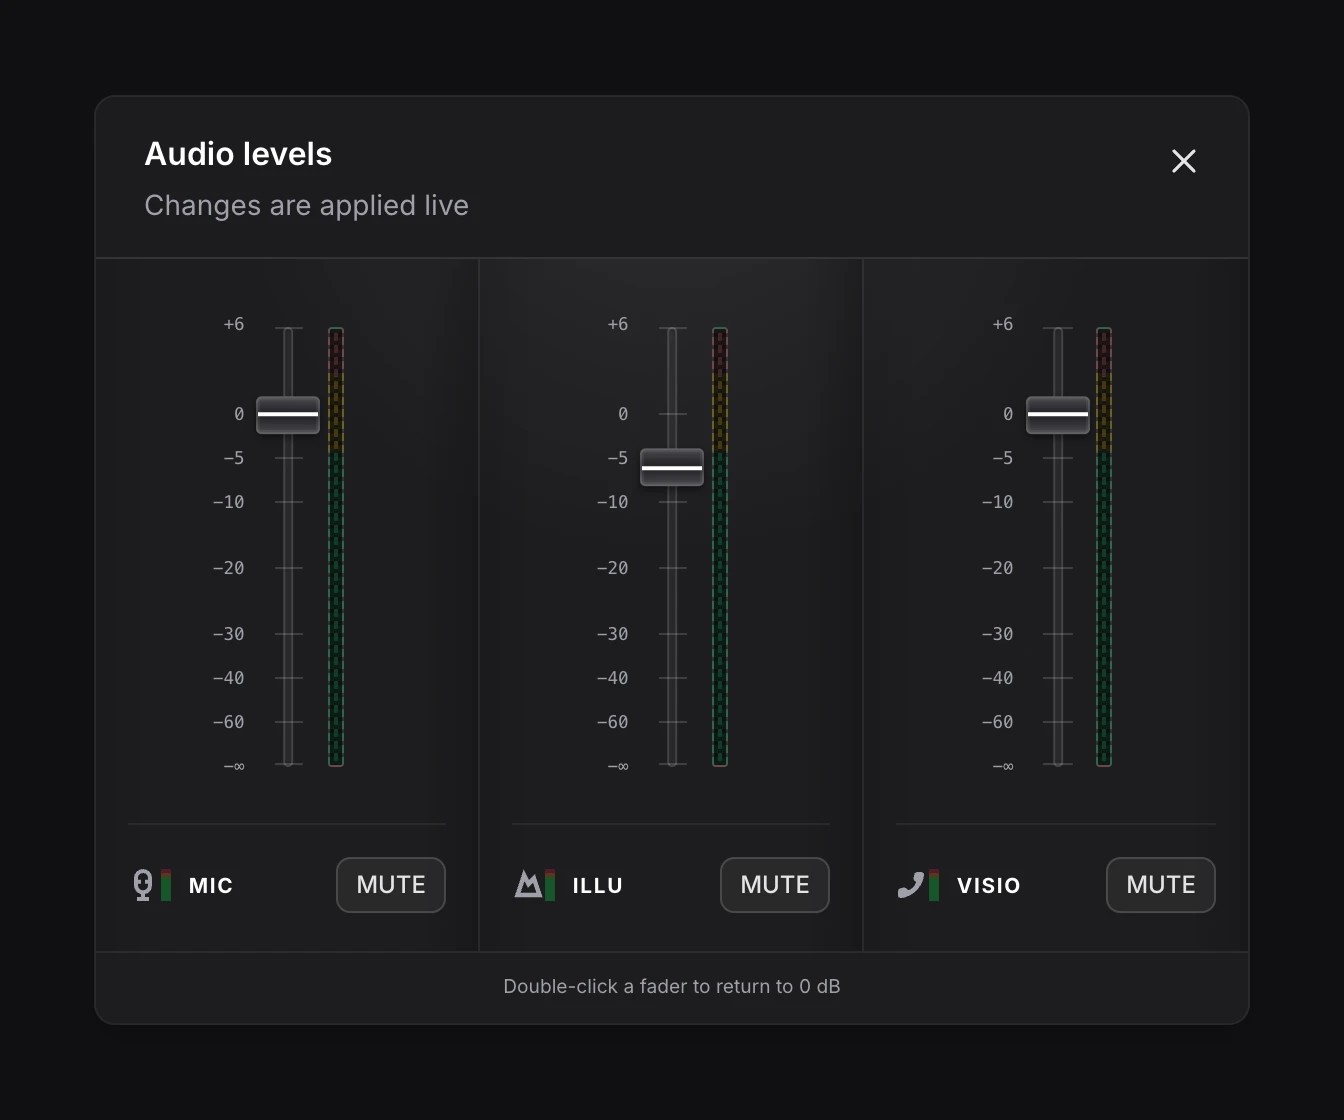
These levels apply immediately and are shared across the studio. Each scene or clip applies its own mute settings. The preview player’s volume only changes your listening volume in the app.
End the session
- End the session
Press the power key and confirm. Ending the session also stops any recording, live stream and meeting in progress.